How to Use playwright-mcp with Claude Desktop - Complete Guide
So, you've got Claude Desktop and Playwright MCP set up. Now it's time to make them work together like a dream. In this guide, we'll take you step by step through writing an end-to-end Playwright test for MakeMyTrip—without the guesswork.
By the end of this, you'll know how to:
- Open a browser inside Claude
- Interact with a website and capture test steps
- Add extra context to make the test smarter
- Extract the right DOM elements
- Generate a complete, AI-assisted Playwright test case
If you're ready to stop struggling with test automation and let your AI assistant do the heavy lifting, let's dive in.
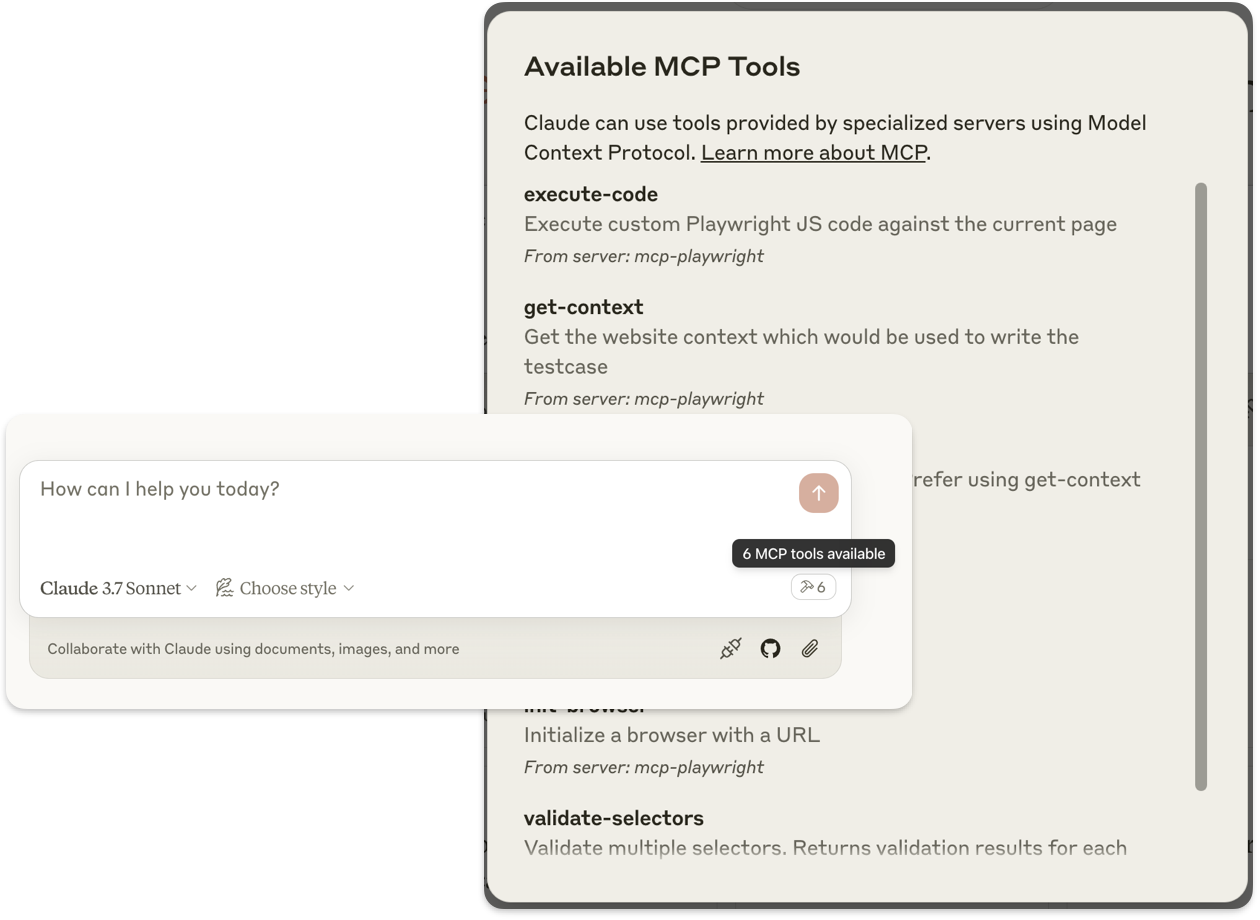
Before you begin: Check If Playwright MCP is Installed
Before anything else, make sure Playwright MCP is installed on your Claude Desktop app.
- Once installed, you'll see a tool icon in Claude Desktop. Click it.
- This will bring up a list of available Playwright MCP tools. If you're wondering what each tool does, take a quick look at the screenshot provided in the reference.
- These tools are what make Playwright MCP so powerful, and we'll be using them in the next steps.
- If it's already installed, great—you're good to go.
- If not, head over to the installation guide and set it up first.
Let's start Writing an End-to-End Playwright Test
We're going to write a full Playwright test for MakeMyTrip Search. Instead of manually writing selectors and hoping they work, we'll let Claude watch our interactions, record them, and generate the test for us.
Step 1: Open a Playwright-Controlled Browser
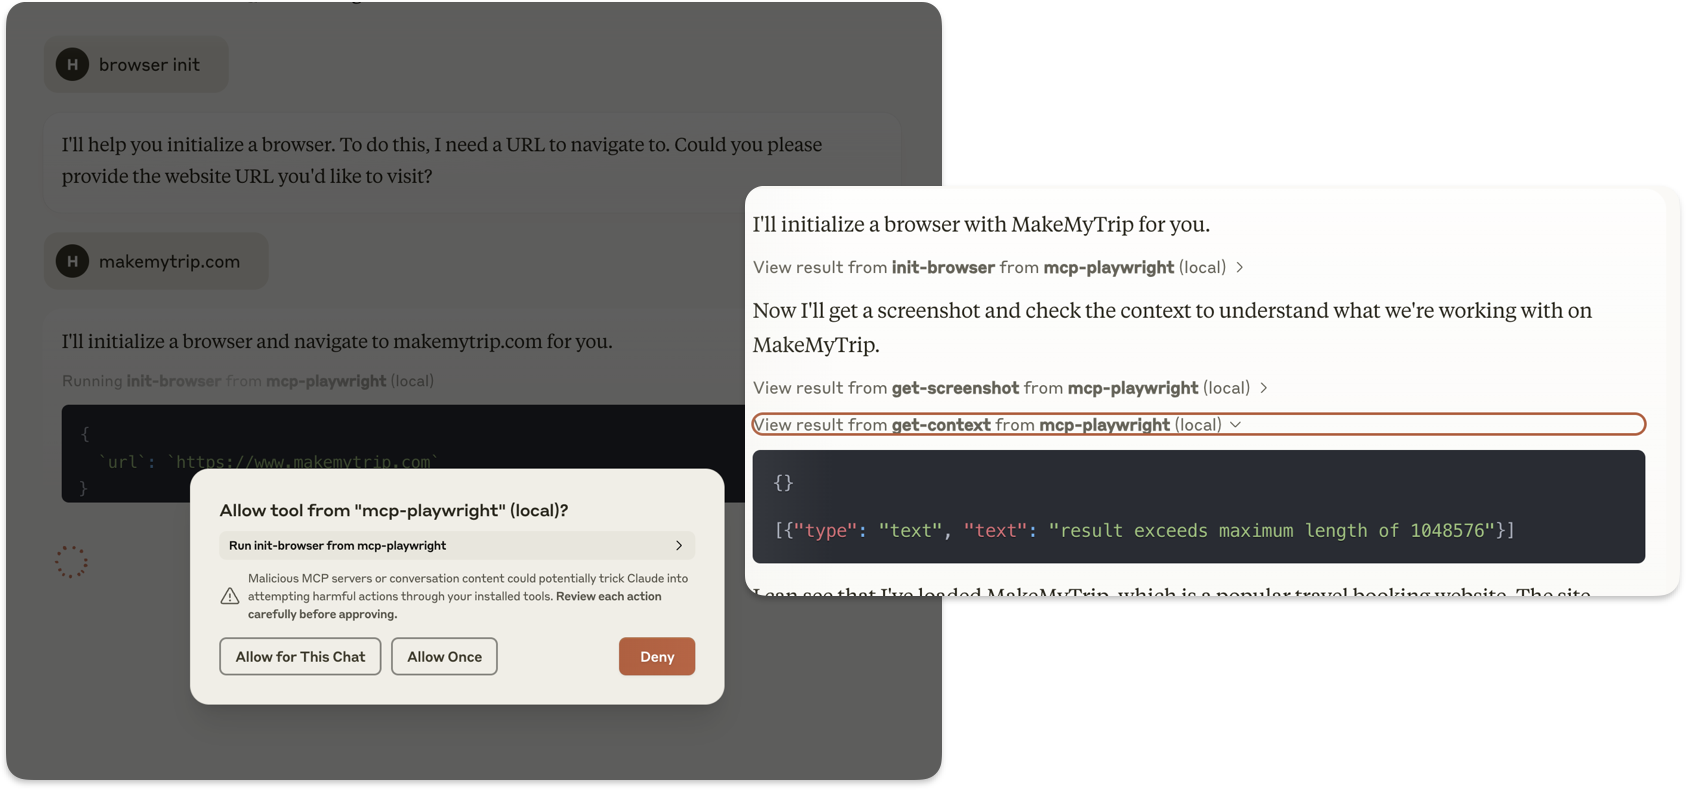
To begin, we need a browser window that Claude can see and interact with.
- Open Claude and type:
- Browser init
- Since this tool needs a URL, Claude will ask you to enter one.
- Enter the MakeMyTrip website:
- makemytrip.com
- Claude will ask for permission to run the tool. Allow it.
- Once approved, a browser window will open.
At this point, you can start interacting with the MakeMyTrip website just like you would manually.
Step 2: Record Your Interactions
Here's where the magic happens. As you start using the website—clicking, searching, filling out forms—Claude will record every action.
Look at the right-hand side of Claude's interface. You'll see every step you take being logged in real-time.
This means no more:
- Manually writing test steps
- Guessing which selectors to use
- Debugging flaky AI-generated test cases
Everything you do is automatically turned into Playwright test steps.
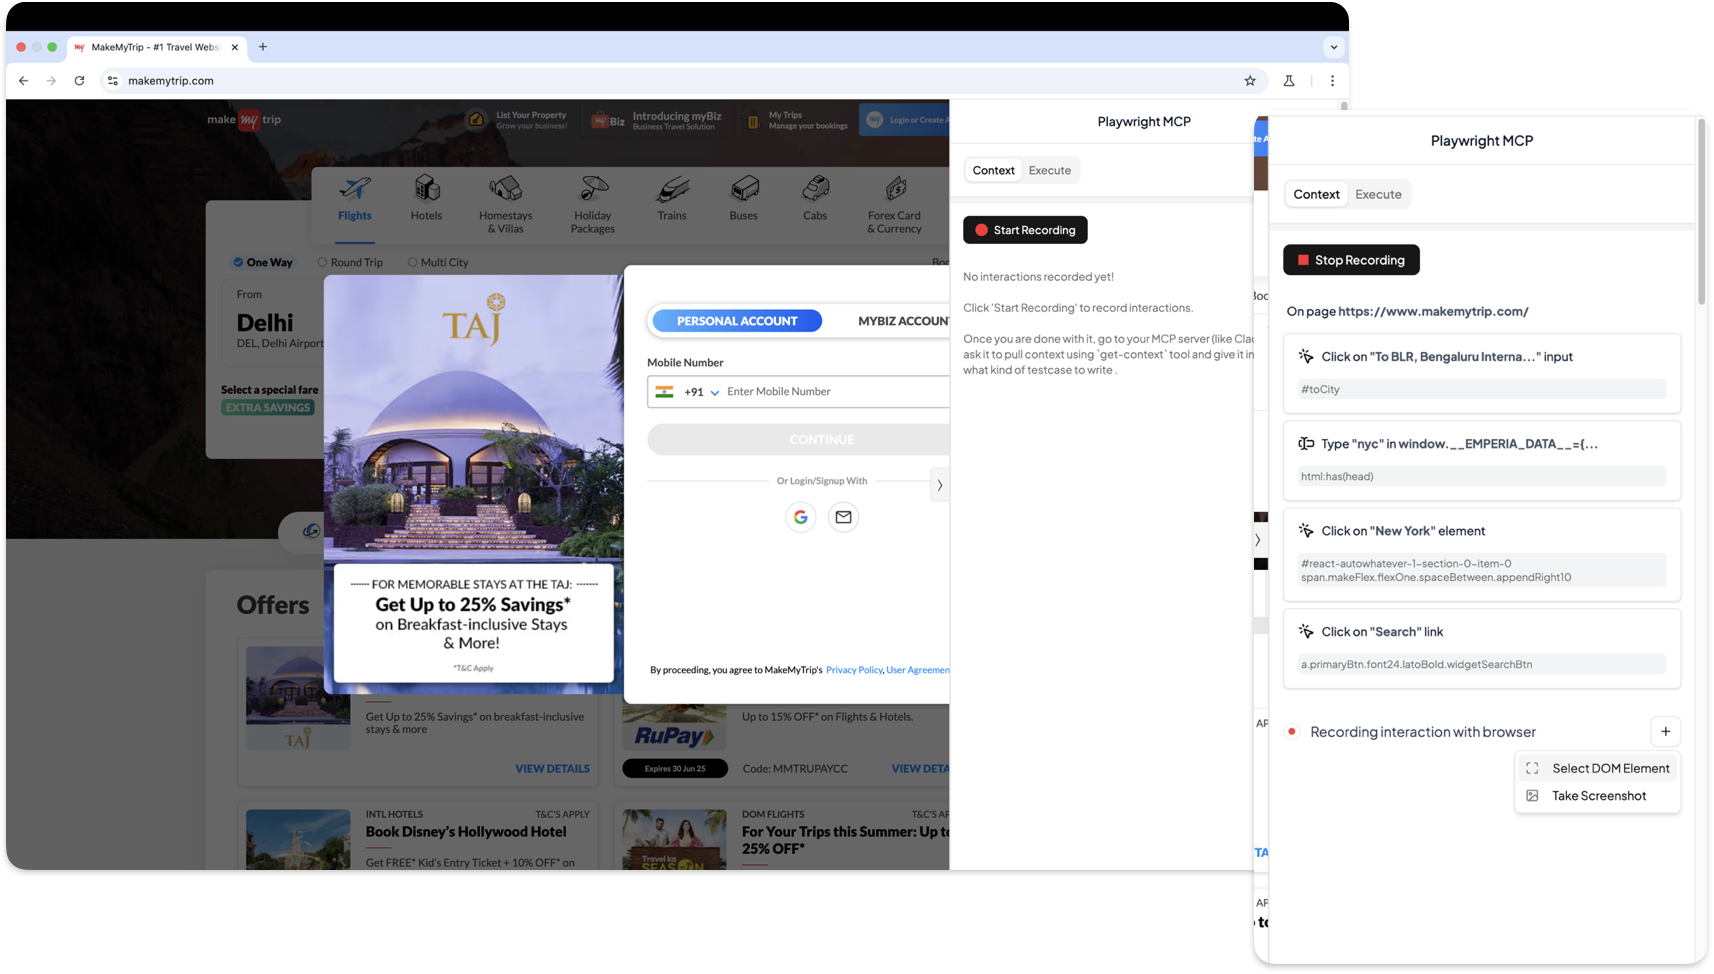
Step 3: Add Extra Context (The Secret Sauce for Better Tests)
Here's where most test recording tools fall short: They capture actions, but they don't understand what's happening on the page.
Claude, however, can do a much better job if we provide extra context.
- At the bottom-right corner, you'll see a plus (+) icon. Click it.
- Select DOM.
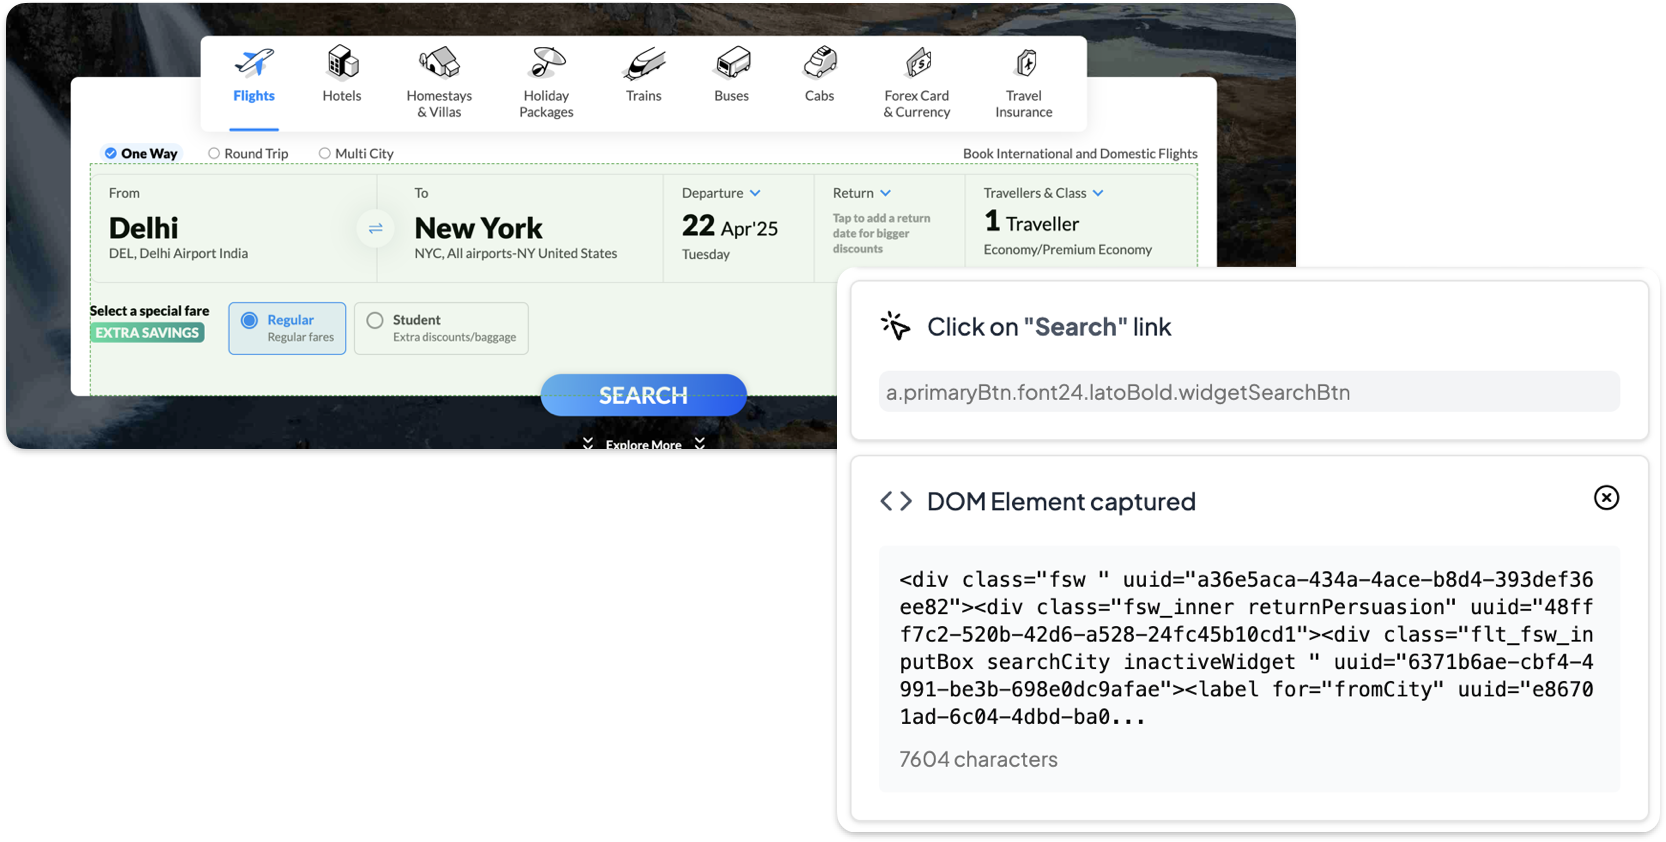
- Now, choose a specific part of the page that's important for the test. (See the green part in the screenshot)
This tells Claude:
- Which elements actually matter in your test
- Which selectors to focus on
- How to make your Playwright test more reliable
After selecting a DOM section, you'll see the extracted HTML appear below your recorded steps. This is your test's foundation—it ensures that Claude picks the best possible selectors instead of guessing.
Step 4: Extract Context and Generate the Final Test Case
Now that recording is complete, it's time to give Claude all the information it needs to write the best possible test case.
-
Go to Claude and ask it to write the test case.
-
Instead of jumping straight into writing, Claude will need more context from your recorded interactions.
-
Ask Claude to call another tool, either:
get context -
This tool will retrieve all interactions recorded in the browser session along with the exact HTML component that you selected earlier.
At this point, Claude will describe all interactions it captured.
- It will list the actions you performed.
- It will show the selected elements with their context.
Now, Claude has everything it needs to generate a rock-solid Playwright test case.

Step 5: Ask Claude to Write the Playwright Test Case
The last step is simple:
-
Ask Claude:
Using the context, help me write playwright code for e2e testing. -
Claude will analyze the recorded interactions, extracted DOM, and selectors.
-
It will generate a fully automated Playwright test.
In the screenshot reference, you'll see how Claude writes an amazingly structured Playwright test based on your recorded session.
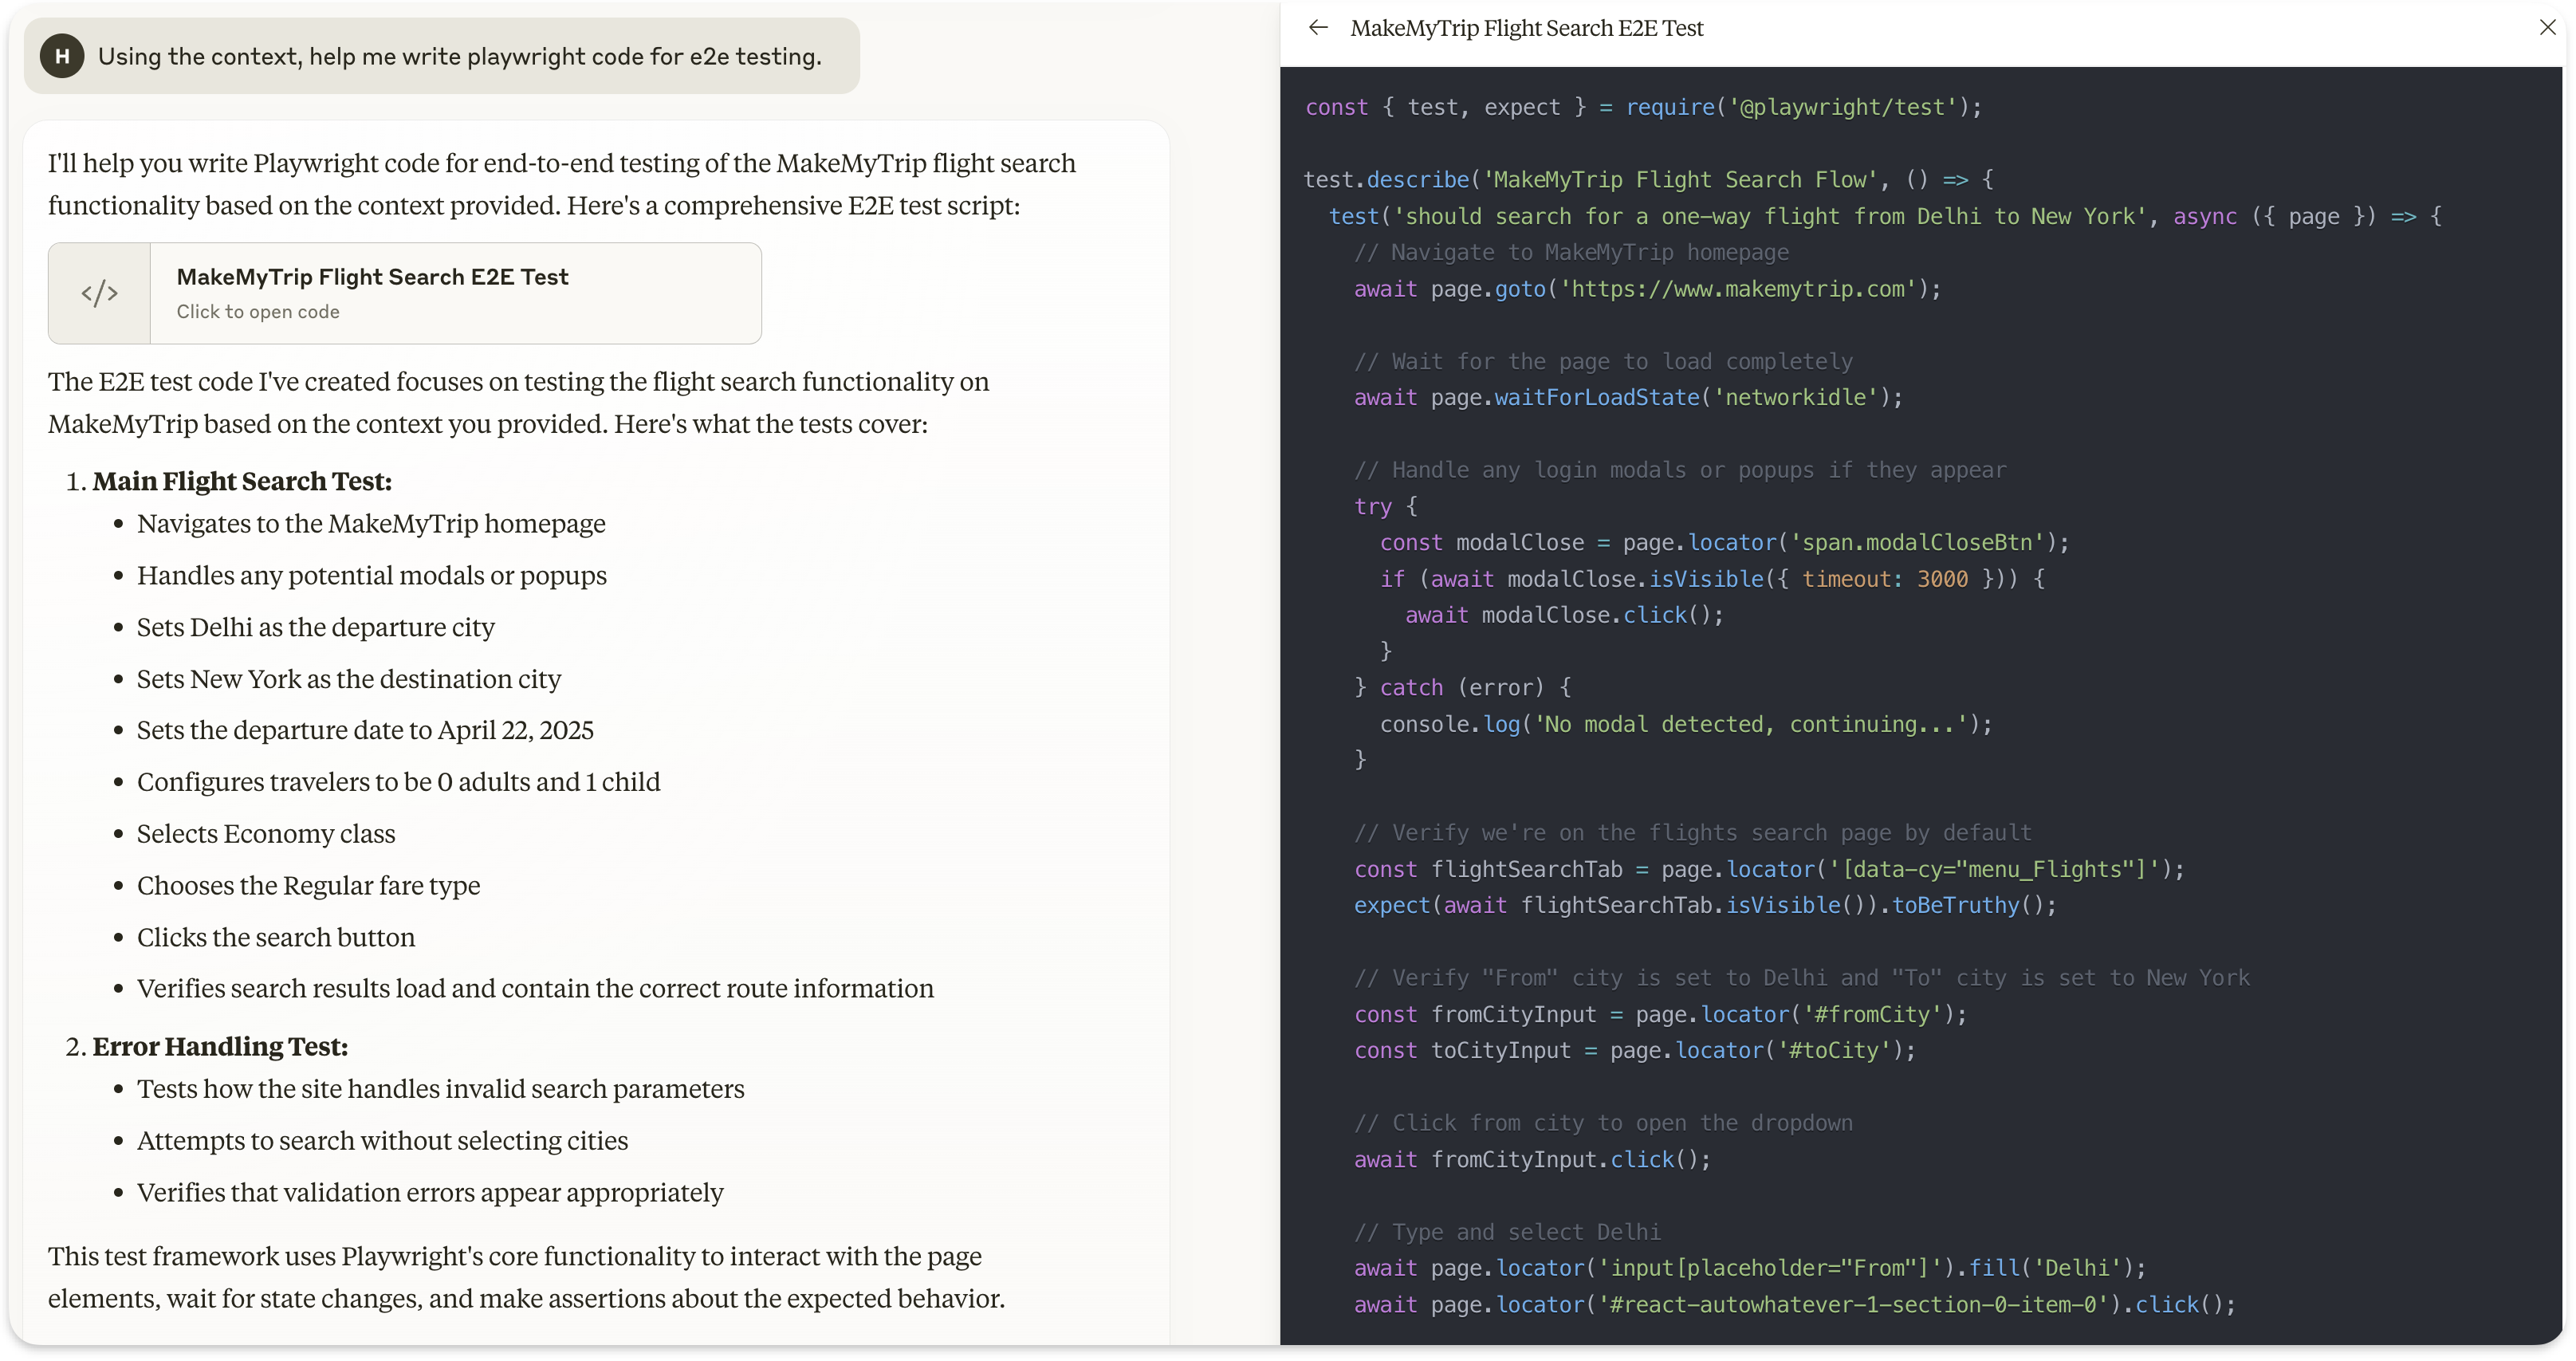
This is not just another AI-generated script—this is a fully usable, highly accurate Playwright test with validated selectors and reliable interactions.
Bonus:
Here is a more descriptive prompt for you to use:
    ## DON'T ASSUME ANYTHING. Whatever you write in code, it must be found in the context. Otherwise leave comments.

    ## Goal
    Help me write playwright code with following functionalities:
    - [[add semi-high level functionality you want here]]
    - [[more]]
    - [[more]]
    - [[more]]

    ## Steps
    - First fetch the context from `get-context` tool, until it returns no elements remaining
    - Based on context and user functionality, write code in POM format, encapsulating high level functionality into reusable functions
    - Try executing code using `execute-code` tool. You could be on any page, so make sure to navigate to the correct page
    - Write spec file using those reusable functions, covering multiple scenarios
This prompt will also make sure that the selectors are working(A problem we face with LLM based tests a lot).
Now that you understand how to write a basic test case, head over to advanced features for more advanced usage.
Happy coding!